Blogs
How to Make Cannabis Brownies with Flower?

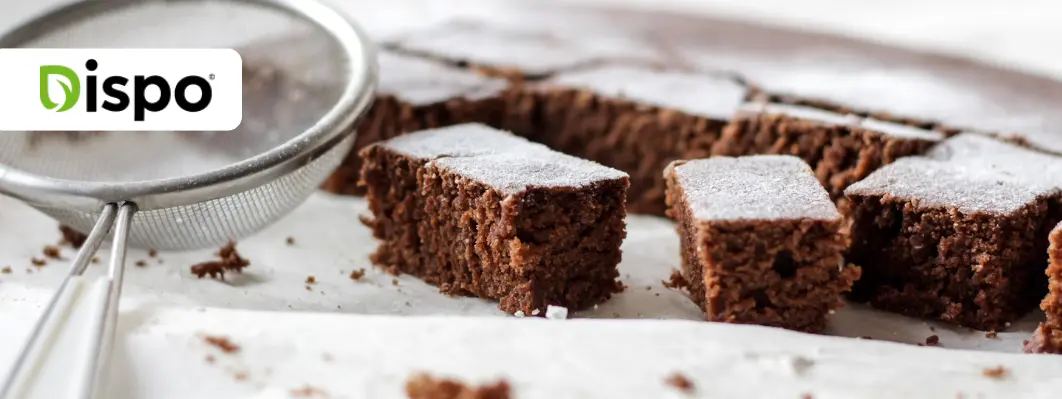
Cannabis brownies have an outstanding reputation for its delicious taste, and intense effects. Whether you need to enhance relaxation, or alleviate pain, cannabis brownies are a great treat for both recreational, and medical users.
There’s a common misconception that you need a substantial level of culinary expertise to make cannabis brownies.
But that’s not true, in fact, with the right recipe, and appropriate guidance even beginners can make delicious cannabis brownies. So, if you’re wondering how to make cannabis brownies with flowers, this article provides a complete list of ingredients, and a step-by-step guide to help you start making your very own cannabis brownies today!
How to Make Cannabis Brownies with Flower?
The best part about the cannabis brownie recipe is, it’s fairly a quick, and easy process. As straightforward as the recipe is, it’s important to follow them carefully, especially if it’s your first time making cannabis brownie with flower.
Speaking of the flower, before diving into the details of the recipe, it’s important for you to know some basic details about the flower that you will be using. There are mainly two strains of cannabis; the sativa strain, and the indica strain.
The cannabis sativa strain contains a high concentration of the THC (tetrahydrocannabinol), and a low concentration of CBD (cannabidiol). Whereas the cannabis indica strain contains almost equivalent quantities of the THC, and CBD components typically with a 1:1 ratio.
THC is the psychoactive chemical compound in the flower that makes you high. The CBD component typically helps you feel more relaxed, helps you alleviate pain, and fall asleep.
So, it’s important to choose your flower wisely, and if it’s your first time baking cannabis brownies then it’s best to go for the indica strain. It’s more balanced and it won’t lead to unwanted effects like suddenly dozing off and having no memory of the whole high experience.
On the other hand, if you’re a weed enthusiast with adequate experience, then you can try the cannabis sativa strain but make sure not to go overboard. Now that you’re aware of which cannabis flower is more suitable for you, let's get introduced to the ingredients, and proceed with recipe to make cannabis brownie.
Ingredients for Making Cannabis Brownie
Here are the ingredients that you will need for making cannabis brownie which includes the following.
- Cannabis Flower: 1 gram (1/4th teaspoon) of cannabis flower
- Cannabutter: 1 stick of cannabutter which is generally equivalent to 4 ounces (115 grams)
- Cannaoil (alternative of cannabutter): ½ cup of infused coconut oil (cannaoil)
- Eggs: 2 large eggs or 4 medium eggs
- Crushed Chocolate Bars: Up to 175 grams of crushed dark chocolate
- Cocoa Powder: 3/4th cup of cocoa powder
- Cake Flour: 1 cup of cake flour
- Vanilla Extract: 1 teaspoon of vanilla extract
- Sugar: 3/4th cup to 1 cup (depending on your preference)
- Salt: ½ teaspoon
- Baking Powder: 1/4th teaspoon
- Baking Soda: 1/8th teaspoon
When it comes to making cannabis brownie, you can use either cannabutter or cannaoil. The advantage of using cannabutter is that it forms a softer, and fluffier brownie texture, and it blends very well with the chocolate which gives an enhanced taste.
Cannaoil is a healthier alternative that can provide additional benefits, such as omega-3 fatty acids and antioxidants. Ultimately, the choice between cannabutter and cannaoil comes down to personal preference.
Here at Dispo Cannabis Dispensary, we have a wide variety of cannabis flowers to ensure that you have the right one for your cannabis brownie.
Decarb Your Cannabis Flower
The thing about the weed is, it wouldn't be potent if you directly use the raw cannabis to bake the brownies. So, that’s why you will have to decarboxylate, or decarb the flower by baking it in a pre-heated oven at a high temperature of 250 F (120 C) for 25 to 30 minutes.
Before you start decarbing the weed, make sure to grind the cannabis flower into a fine consistency, and place it in a parchment paper on the tray. You will have to decarb the flower to smoothly extract the desired chemical compounds from the cannabinoid, mainly the THC.
So, after you are done heating the cannabis flower at 250 F for about 30 mins, you will notice that its appearance has changed into a brownish green color, and that’s when you will know that your flower has been decarbed. After decarbing the flower, it’s time to proceed to the next step, that is making the infused cannabis butter, or coconut oil, which is commonly known as cannabutter and cannaoil.
Make Cannabutter or Cannaoil (Main Ingredient)
The process of making cannabutter, or cannaoil is the same. But to make it easier to understand and follow, it’s better to explain the methods individually.
So, to make cannabutter you will have to heat up a saucepan or a double boiler, whichever you prefer using. Let’s say you’re using a saucepan, set your stove to a low-medium heat around 250-300°F and wait for a min for the saucepan to heat up. Once it does, place the butter stick on the hot pan and use a spatula to slowly stir it, so that it melts properly, and doesn’t burn accidentally.
Now pour a cup of water into the pan and stir it with the spatula to ensure that the melted butter completely mixes with the water, and then let it boil. The moment the water starts bubbling, pour in decarbed weed into the mixture and stir it gently. Now it’s time to simmer the mixture in low heat for 3 to 4 hours.
While it’s simmering make sure to actively check the pan to ensure that it doesn’t burn. After 3 to 4 hours, the mixture should be a watery consistency. It’s important not to drain out all the water, as it can burn the mixture. If you feel like it's starting to solidify add half a cup of water, and let it simmer for a few minutes until it forms a creamy mixture.
Now turn off the stove and let the mixture cool down. After it does, it’s time to strain out the butter and separate it from decarbed flower. You will just need the butter now, as the THC is already infused with the butter in a very concentrated form.
Use a fine mesh strainer, or a cheesecloth to strain the butter out and pour it in a bowl leaving all the plant material behind. And done, now you have the cannabutter!
Similarly, for making cannaoil, you will have to heat up the coconut oil, or olive oil in a saucepan, and mix it well with the decarbed cannabis. Let the mixture cool down, and then use a mesh strainer or cheesecloth to squeeze out the oil in a glass container while separating it from the plant remains.
Make sure to store the cannabutter, or cannaoil in an airtight container, and keep it in refrigerator to ensure it stays fresh.
Prepare the Dry Mixture in a Bowl
Put all the dry ingredients in a bowl which includes the cocoa powder, cake flour, sugar, salt, and baking powder, and thoroughly whisk it into a dry mixture. Now set the bowl aside and preheat the oven to 350 F (180 C).
If you feel like your dry mixture might get lumpy, then you can sift some of the ingredients like the flour and cocoa powder to create a more dryish and powdery texture. So, while you stir the mixture, it will help you mix these dry ingredients into a more consistent mixture.
Whisk the Wet Mixture in a Bowl
Get a bowl, and thoroughly whisk the eggs with the vanilla extract. After you are done with that use another bowl to melt the crushed chocolates in a microwave for about 5 to 10 seconds. If you don’t have a microwave, you can use a double boiler to melt the chocolates.
It is important to actively stir the chocolate in low heat (150-170°F) in the double boiler to ensure that it doesn’t stick and burn. Once the chocolate has melted, put it back in the bowl, and allow it to cool down to room temperature, which should take about 5 mins.
Now it’s time to mix all your wet ingredients which includes the melted chocolates, cannabutter/cannaoil, baking soda and the whisked eggs and vanilla extract. Pour all these items into the bowl where you have the mixture of the eggs with vanilla extract and whisk it thoroughly until it turns into a creamy paste.
Here is a Guide: How to make cannabis edible?
Combine the Two Mixtures in the Same Bowl
Now put the creamy paste from the wet bowl into the dry bowl and stir it until it's totally mixed. Once the whole mixture turns into a creamy paste, congratulations you have your batter ready.
While you’re stirring and mixing them, it is very important to ensure there aren’t any lumps. So, you will have to put in the effort to make a thick, and creamy batter. This can take a while, but the effort will definitely ensure making your finest cannabis brownies.
Bake, and Enjoy Your Freshly Baked Cannabis Brownies
Remember, you had to preheat the oven to 350 F, well if you haven’t it’s time to get it pre-heated. The exciting thing is, you have the batter ready, now all you need to do is bake it!
Pour the brownie in your oven tray, or a brownie pan, if you have one. Place parchment paper on the tray or pan and put the batter on it. Then put it in the oven and bake it at 350 F for 15 minutes.
Once the oven beeps, your cannabis brownies are ready! Take out the tray, and let it cool down to room temperature, which should take about 10 minutes. Then you can cut it into proportionate slices and enjoy your freshly baked cannabis brownies.
Make sure to store the brownies in a refrigerator, or a deep freezer. You can store brownies in a refrigerator for up to 2 weeks, and a deep freezer for up to 3 months. So, if you make a lot of cannabis brownies then you store them in the freezer. And the ones that you are planning to consume in a few days, you can keep in the refrigerator.
When it comes to storing brownies in a freezer, their taste can gradually degrade over time even though it’s safe to consume for up to three months. So, to ensure the best taste and texture it's recommended that you consume these brownies within 2 months.
Time to Make Your Very Own Cannabis Brownies
Now that you know all the ingredients, equipment, and recipe, you can follow each of these steps to make your own cannabis brownies. If it’s your first time making cannabis brownies make sure to eat a small amount of these brownies, like one standard slice per person.
Wait up to 60 to 90 minutes, as it takes time for the cannabis’s effect to kick in. If you feel like you’re already high, then hit the brakes there and consume more afterwards. While it’s fun to enjoy the high that you get from cannabis brownies, it’s also important to ensure you don’t overdo it.
For instance, if you pass out or get so high or if you don’t know what you’re doing, you wouldn’t enjoy the experience.
The point of getting high is to feel more relaxed and have a good time, so it’s worth remembering the experience. Making cannabis brownies is a great way to enjoy a tasty dessert with the highest potency of the flower. If you haven’t started baking yet, what are you waiting for? Go to the kitchen and get started!
FAQs
Can I use flower directly to make the cannabis brownies?
No, directly using the flower on the cannabis brownies wouldn’t serve the purpose because you wouldn’t get high. To bring out the potency of the weed, it’s crucial to extract the THC by heating the grinded flower in an oven, and then infusing it with butter or oil.
How many grams of bud do you need for cannabis brownie?
You would need to first prepare the key ingredient of the cannabis brownie, which is either the cannabutter or cannaoil. So, it depends on how potent you want your brownie to be. If you want to make a moderate dosage then it’s best to use 1-2 grams of bud, and for a strong dose you can use 3-5 grams of bud or more for a batch of 12 brownies.
How do you know when decarboxylation of the flower is complete?
Once the grinded flower turns brownish green you would know that the decarboxylation is complete. In simpler words, your flower has been properly decarbed.
Are homemade cannabis brownies better?
Well, it depends if you are using the proper ingredients and the right recipe. If you get the right ingredients and follow a well guided recipe then homemade cannabis brownies would be definitely a better choice than buying it from dispensaries or bakeries.