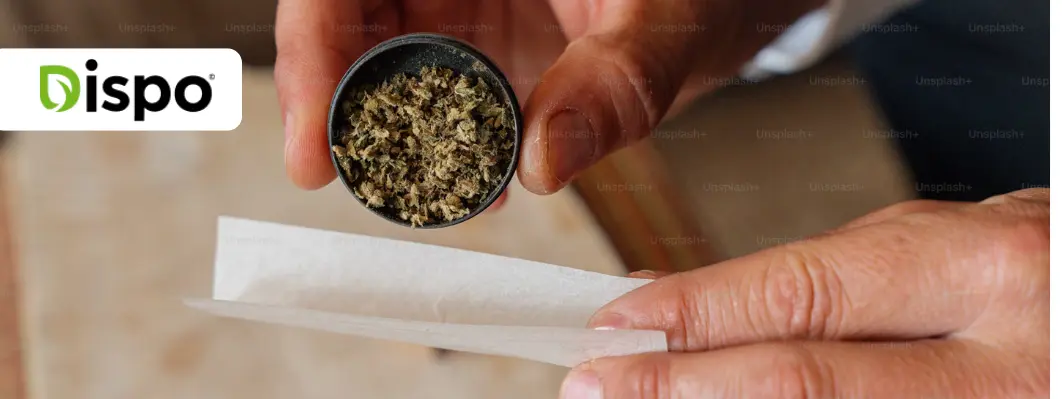
How to Smoke a Pre-Roll Properly?
Whether you’re new to cannabis or a seasoned enthusiast, knowing how to smoke a pre roll properly is necessary for an enjoyable cannabis experience. By understanding the basics of smoking readymade rolls, you can get the most out of it every time you light up. From handling the cannabis pre-rolls to taking your first puff, each step plays a key role in contributing to desired effects throughout your body and mind.
Today, in this guide, we’ll walk you through the simple yet essential technique for smoking a pre-roll like a pro. Let’s begin.
Things You Need to Know About Cannabis Pre-rolls
When it comes to smoking pre-rolls, there are a few important things to know. First off, it’s crucial to understand the different types of pre-rolls available. Pre-rolls come in two different categories: regular and infused.
Regular pre-rolls are straightforward joints filled with cannabis flowers, perfect for a classic smoking experience. On the other hand, infused pre-rolls contain additional extracts or concentrates that offer a more potent or flavorful option.
Now, what exactly is a pre-roll? Simply put, it’s a ready-made joint that you can light up any time and enjoy without the hassle of rolling it yourself. This convenience makes pre-rolls a popular choice for both beginners and experienced cannabis users alike.
When you're just starting out, regular pre-rolls are often the best choice. The smaller amount of THC in them makes them a good way to start using cannabis without getting too high. Plus, they offer a consistent smoking experience every time. This makes them ideal for those new to smoking.
How to Smoke a Pre-Roll
To smoke a pre-roll properly, you need to start by removing it from its packaging and inspecting it for any damage. To make sure a smooth and enjoyable cannabis smoking experience, we’ll explore the step-by-step process of smoking a pre-roll. Here's what you need to keep in mind:
1. Inspect the Pre-Roll
2. Settle the Cannabis Inside
3. Hold the Pre-Roll
4. Toast the Tip
5. Take the First Puff
6. Inhale into Your Lungs
7. Rotate for Even Burning
8. Avoid Inhaling While Lighting
9. Enjoy the Experience
10. Extinguish Safely
Step 1: Inspect the Pre-Roll
Before lighting up, take a moment to inspect the pre-roll. Ensure there is no visible damage or tears in the paper. Check that the cannabis inside appears evenly distributed. This step can make sure that you are starting with a properly rolled pre-roll for the best smoking experience.
Step 2: Settle the Cannabis Inside
To ensure an even burn, lightly tap the pre-roll on a solid surface. This helps the cannabis inside settle down, so it doesn't get packed too tightly or spread out widely. A pre-roll that is well-settled makes smoking more enjoyable by keeping the burn rate steady.
Step 3: Hold the Pre-Rolls
Hold the pre-roll between your thumb and index finger, with the filter end (the end without the twisted tip) facing your mouth. Position it slightly upward to make lightning easier and prevent any loose bits of cannabis from falling out.
Step 4: Toast the Tip
Using a lighter or a match, apply flame to the twisted end (the tip) of the pre-roll while rotating it gently. This technique, known as “toasting,” ensures an even burn across the surface of the pre-roll. Avoid placing the flame directly onto the joint, as this can cause uneven burning and alter the flavor.
Here Is a Guide: Benefits of using Pre-Rolled Joints
Step 5: Take the First Puff
Once the tip is lit all the way through, draw the smoke into your mouth for the first puff. To keep from getting too much smoke, start with small, gentle puffs. Before taking a big breath, this lets you taste the flavor and get a sense of how strong the pre-roll is.
Step 6: Inhale Into Your Lungs
When you get the smoke in your mouth, inhale deeply to bring it into your lungs. Combine the smoke with fresh air to prevent a harsh hit and maximize the absorption of cannabinoids into your bloodstream. Hold the smoke in your lungs for a few moments before exhaling slowly.
Step 7: Rotate for Even Burning
As you smoke the pre-roll, rotate it between your fingers periodically. This helps ensure an even burn and prevents one side from burning faster than the other. By rotating the pre-roll regularly, you’ll maintain a consistent smoking experience from start to finish.
Step 8: Avoid Inhaling While Lighting
When you light the pre-roll, don't breathe in while you put the flame on the tip. If you breathe in during this process, it can change the way the fire burns and cause it to burn unevenly. Instead, make sure the tip is properly lit before you take your first drag.
Here is a guide: How to choose the best cannabis pre-rolls?
Step 9: Enjoy the Experience
Take a deep breath, sit back, and enjoy smoking your pre-roll. Take your time to enjoy how cannabis tastes and makes you feel. It should be fun and stress-free to smoke, whether you're alone or with friends.
Dispo is a reputable cannabis dispensary that sells a variety of cannabis products, such as pre-rolls. Make sure to check out the newest Dispo Deals to find the best weed collections at fair prices.
Step 10: Extinguish Safely
If you’re not planning to smoke the entire pre-roll in one sitting, you can safely extinguish it for later use. Gently tap the lit end against a solid surface to extinguish the flame. Make sure the pre-roll is fully out before leaving it unattended to prevent accidental fires.
Pros and Cons of Smoking Pre-Rolls
Smoking prerolls have both pros and cons. Let’s talk about the pros first.
1. Convenience: Pre-rolls offer the convenience of a ready-to-smoke joint without the need to roll it yourself. If you’re someone who may not have the time or skill to roll their own joints, pre-rolls are a suitable option for you.
2. Timesaving: It takes longer to grind cannabis leaves and roll a joint from scratch than to smoke a pre-roll. It is a quick and effortless way to get high without putting in any extra work.
3. Portability: Pre-rolls are compact and portable which makes them ideal for on-the-go use. Whether you’re hiking, at a concert, or hanging out with friends, prerolls are easy to carry and use whenever you go.
Now let’s discuss the cons of pre-rolls.
1. Cost: Pre-rolls are often more expensive than buying cannabis flowers in bulk. Being easy to use, pre-rolled joints cost more, and some people may find them more costly in the long run.
2. Burn Rate: Pre-rolls can sometimes burn too quickly, especially if not rolled properly. This can result in wasted cannabis and a less enjoyable smoking experience.
3. Potential for Additives: Some pre-rolls may have fillers or additives that are meant to improve the flavor or effects of the cannabis. These may not be harmful, but they may take away from the purity of the experience for people who like to use only natural products.
4. Controlled Customization: People who use pre-rolls don't have much control over what's inside the joint. You can't change the strain or amount of weed in a pre-roll like you can when you roll your own joint, which may not be ideal for people who have specific tastes.
Key Takeaways
Here are key takeaways to remember when smoking pre-rolls:
· Inspect the pre-rolls for any damage before lighting.
· Tap the pre-roll gently to settle the cannabis inside for an even burn.
· Hold the pre-roll slightly upward to make lighting easier.
· Rotate the pre-roll while lighting to ensure an even burn.
· To keep from getting too much smoke in your lungs, take small, gentle puffs.
· Inhale the smoke into your mouth first, then into your lungs along with fresh air.
· Rotate the pre-roll periodically to maintain an even burn.
· Avoid inhaling while lighting to prevent uneven burning.
· Enjoy the flavor and effects of the pre-rolls at your own pace.
· Safely extinguish the pre-roll if you’re not smoking it all at once.
Frequently Asked Questions (FAQs)
Here are some relevant questions and answers related to how to smoke pre-rolls properly.
How Long Can You Smoke a Pre-Roll?
Ans: Several things affect how long a pre-roll lasts, such as its size, the amount of weed it contains, and how it's smoked. Most of the time, a pre-roll lasts between 5 and 15 minutes, but this can change depending on how often you smoke.
How Do Pre-Rolls Make You Feel?
Ans: The effects of pre-rolls rely on the type of cannabis used and how much of it a person can handle. The type of strain (Indica, Sativa, or hybrid) can affect how you feel. Pre-rolls can usually make you feel relaxed, high, creative, or sleepy.
Why Do Pre-Rolls Burn So Fast?
Ans: Pre-rolls may burn quickly if they’re rolled too tightly or if the cannabis inside is dry. Additionally, improper lighting techniques or uneven packing can contribute to faster burning. To avoid this, ensure the pre-roll is properly rolled, lit equally, and smoked at a moderate pace.
Dispo
November 20, 2024
How to Make Cannabis Tincture Non-Alcoholic?
If you’re wondering whether it’s possible to make cannabis tincture without alcohol, then the short answer is yes! Now, you might be thinking how can tincture be made without alcohol?
Well, the thing is cannabis tincture is now typically just an umbrella term, especially as alcohol is a conventional method of creating this highly concentrated cannabis infusion. Similarly, cannabis can also be infused with non-alcoholic base like coconut oil/olive oil, vinegar and vegetable glycerin to make cannabis tincture.
To make things clearer, whether you use alcoholic, or non-alcoholic base, it mainly involves soaking the decarboxylated weed to extract THC from the cannabinoid, and terpenes.
So, you’re infusing the decarbed cannabis with the solvent, which also works the same way for any non-alcoholic base. Even though it’s called cannabis tincture, it is literally cannabis infusion.
Now, if you’re keen to learn how to make cannabis tincture non-alcoholic, this guide covers everything you need to know starting with decarbing the weed, and four effective methods to infuse cannabis with non-alcoholic bases like coconut oil, vinegar, and vegetable glycerin.
Decarboxylate the Cannabis Bud
Before you get started with the infusion process to make cannabis tincture, you will first need decarbed weed. The thing with the raw cannabis is, it’s THC, that is the psychoactive compound that makes you high, and spurs the euphoric effect is inactive in the form of THCA.
Just by soaking the raw cannabis, you wouldn’t get the concentrated potency that you’re expecting. So, the first step is to decarboxylate the cannabis bud by baking it in the oven at a high temperate of 220°F to 250°F for 25 to 30 mins.
So, in this step, pre-heat your oven, and in the meantime get the cannabis bud chopped into tiny pieces, or grinded into a fine powdery mix. After that put the chopped or grinded weed evenly on the parchment paper sitting on the oven’s tray and bake it.
After baking it for 25 to 30 minutes you will notice that the color of the weed has changed to yellowish or brownish green which means it has been decarbed. Now that you have your key ingredient, it’s time to explore 4 methods of making non-alcoholic cannabis tincture.
The potency of the cannabis tincture basically depends on the strain and quality of the flower, so it’s always best to buy it from an established cannabisdispensary.
How to Make Cannabis Tincture Non-Alcoholic?
There are four non-alcoholic methods of making cannabis tincture which includes using oil, vinegar, and vegetable glycerin as the base liquid. Regardless of whichever method you choose, the main step typically involves infusing the decarbed cannabis with your preferred base.
There are specific steps, and ways to create non-alcoholic cannabis tincture for each of these methods. While there are faster processes like boiling the oil and simmering it with decarbed weed. There are also simpler and more time-consuming methods like dissolving the decarbed weed in the base liquid whether it’s oil, vinegar, or vegetable glycerin for 3 to 4 weeks.
Let’s get down to the details and learn how to make your very own non-alcoholic cannabis tincture by using each of these methods in the following sections.
At Dispo cannabis dispensary, we’ve high quality non-alcoholic cannabis tinctures that you should definitely check out.
Oil-Based Method
So, here’s what you will need to make non-alcoholic cannabis tincture with the oil-based method:
· 1 cup (250ml) of Coconut or Olive Oil
· 7 grams of Decarbed Weed
· Saucepan or Double Boiler
· Cheesecloth
· 1 Glass Bowl
· 1 Ounce Glass Bottles
· Funnel or Dropper
Let’s start by putting a saucepan on the stove and setting it to low heat. Wait for about 30 seconds for the saucepan to heat up, and then pour 1 cup of coconut or olive oil on the pan. Once the oil heats up, put the decarbed weed on the pan, and stir it well to ensure that the weed completely mixes with the oil.
Now cover the lid of the saucepan letting it simmer in low heat for about 3 hours. While it’s simmering, you need to open the lid every few minutes and stir the mixture. After simmering it for 3 hours, turn off the stove, and wait for about 20 to 30 minutes for the mixture to totally cool down to room temperature.
Once it cools down get a glass bowl and cover its top part with a cheesecloth. You can even use a rubber band to ensure the cheesecloth firmly stays in place. Now slowly tilt the sauce and pour the mixture on the bowl over the cheesecloth. The cheesecloth will strain all the plant materials while the oil seamlessly drips into the bowl.
Once all the oil gets strained into the bowl, you can open the rubber band and throw the cheesecloth along with filtered weed. Done! Your cannabis tincture is now ready.
Now you can use a funnel or dropper to transfer it into the 1-ounce glass bottles. But it will be faster to transfer it with a funnel.
P.S, you can also use a double boiler or a crockpot to make cannabis tincture using the oil method but make sure it does not exceed over 200°F. To stay on the safe side, it’s best keep it in a low heat of about 170-180°F to ensure that the heat does not burn the weed or destroy its chemical compounds.
The Simple Method
The simple method is also an oil-based method, but instead of heating up the oil, you will just have to soak it in a mason jar with the decarbed weed. Here’s what you will need to make cannabis tincture using the simple method:
· 1 cup (250ml) of Coconut or Olive Oil
· 7 grams of Decarbed Weed
· Cheesecloth
· 1 Mason Jar
· 1 Spoon
· 1 Ounce Glass Bottles
· Funnel or Dropper
Now let’s get started with the process. Open the lid of the mason jar and put 7 grams of decarbed weed and 1 cup of oil into the jar. Stir the oil in the jar to properly mix it with the weed. Once that’s done get the spoon out, and close the lid of the mason jar, and shake it vigorously for about 5 minutes.
Store the mason jar containing the mixture in a cool dark place, either in the kitchen’s cabinet or the pantry. Now comes the hard part, you will have to let the decarbed weed soak in the oil for 3 to 5 weeks.
So, you will sure need a lot of patience, and on top of that, you will have to shake the jar at least once every day. It’s better if you can shake it two to three times a day, this will help the weed mix faster with the oil and release its extracts. Repeat shaking it for about a month, and then similarly like the oil method you will have to strain out the plant materials using a cheesecloth.
After straining it out, transfer it to the 1-ounce glass bottles, and keep it stored in a cool dark place to ensure that it stays out of direct sunlight.
Using Vinegar
The biggest advantage of using vinegar to make cannabis tincture is, it produces a very similar cannabis tincture like the alcohol-based recipe. Also, the process is simple, and a lot faster, as you need to soak the decarbed weed in vinegar for just 2 weeks.
Here’s what you will need for making non-alcoholic cannabis tincture with vinegar:
· 7 grams of Decarbed Cannabis
· 1 cup of Apple Cider Vinegar (250ml)
· 1 Mason jar
· 1 Spoon
· Cheesecloth
· 1 Ounce Glass Bottles
· Funnel or Dropper
Similarly to the simple oil method, you will have to mix the 7 grams of decarbed weed in a mason jar with 1 cup of apple cider vinegar. Make sure to stir the mixture properly, and then close the jar’s lid to shake it well for about 5 minutes.
Once that’s done close the jar’s lid, and keep the mixture stored in a cool dark place for about 2 weeks. Make sure to shake the jar at least once every day, although it’s recommended to shake it 2 to 3 times a day, once is fine too. If you accidentally forget to shake it one day, it’s fine, do it as soon as you remember it. Repeat this process for up to 2 weeks.
After 2 weeks, it’s time to strain the plant materials from the vinegar as the THC, and other desired compounds are now concentrated in the vinegar. So, use a cheesecloth to strain the plant materials from the vinegar in jar or glass bowl, and done, you now have the non-alcoholic cannabis tincture made using vinegar.
Transfer the cannabis tincture into glass bottles and keep them stored in a cool dry place. There is one thing though compared to other methods the shelf life of cannabis tincture made using vinegar is a lot shorter. It stays fresh, and safe for consumption for up to 1 year.
So, make sure to either consume it in one year, or throw it away after a year. It's best to label it with the manufacturing and expiry date just to ensure that it does not get consumed after expiration.
With Vegetable Glycerin
When it comes to making non-alcoholic cannabis tincture with vegetable glycerin, you will have to give quite a bit of an effort. But just like the oil method, this is also an effective approach to make cannabistincture a lot faster.
So, here’s what you will need to make non-alcoholic cannabis tincture with vegetable glycerin:
· 2 Cups (500ml) of Vegetable Glycerin
· 1 Cup of Decarbed Weed (14 grams)
· 1 Mason Jar
· Crockpot
· Tea Towel
· Oven Gloves
· Glass Bowl
· Funnel or Dropper
· 1-Ounce Glass Bottles
Get a tea towel and place it evenly inside the crockpot. Fill half of the crockpot with water and turn it on in a low heat setting. In the meantime, put 14 decarbed weed in the mason jar and 2 cups of vegetable glycerin, close the lid and shake the jar vigorously.
Now slowly put the mason jar inside the crockpot and let the mixture get simmered for 24 hours. After it cooks for 24 hours use your oven gloves to carefully take out the glass jar. Wait for an hour or so for the jar and the glycerin to completely cool down to room temperature.
Then, strain the mixture using a cheesecloth into a clean jar or bowl. After that use a funnel or dropper to transfer the cannabis tincture into the 1-ounce glass bottles and store them in a cool dry place. Make sure to consume them within a year as glycerin-based cannabis tincture also have a short shelf life of up to 1 year.
Bottomline: Which Non-Alcoholic Method Would You Use?
If you have read this far, you know all four methods of making non-alcoholic cannabis tincture. Each of these methods is quite similar with a few significant differences. For instance, the oil-based method, and vegetable glycerin method are typically much faster approaches, but they require a lot of hard work in the kitchen.
While the simple oil and vinegar method are much simpler which basically requires storing the decarbed weed in a jar, and shaking it a few times, or at least once a day. But you will have to wait for about a month for the extracts to properly mix with the base liquid, whereas the oil-based and vegetable glycerin methods would need a couple of hours to a day at max.
So, it basically comes down to two choices; are you willing to make the extra effort to produce the non-alcoholic tinctures faster? Or go for simpler methods which require time and patience.
Well, regardless of whichever method you choose, you can easily produce high quality non-alcoholic tincture at home by applying the methods in this guide. So, what are you waiting for? Gather your supplies and start creating your own non-alcoholic cannabis tinctures at home!
FAQ
How to make non-alcoholic non cannabis flavored tincture?
You can mix honey or maple syrup with the mixture of decarbed cannabis, and any of the non-alcoholic base which includes coconut oil, olive oil, MCT oil, vinegar or vegetable glycerin to replace and alter the smell the non-alcoholic base as well as the cannabis.
Are cannabis tinctures better with or without alcohol?
Cannabis tinctures are better with alcohol especially because alcohol can effectively extract the desired compounds and produce higher potency than non-alcoholic cannabis tinctures. But on the other hand, if you follow the right methods then it’s also possible to make closer non-alcoholic tincture that have almost the same potency.
What is a tincture without alcohol called?
A non-alcoholic cannabis tincture is often referred to as a cannabis-infused oil or cannabis-infused elixir. These terms emphasize the use of a non-alcoholic base, such as coconut oil, olive oil, or vegetable glycerin, to extract the cannabinoids and terpenes from the cannabis plant.
Dispo
November 19, 2024
How to Store Cannabis Edibles Properly?
The popularity of cannabis-infused edibles continues to rise. That’s why understanding how to store cannabis edibles properly becomes increasingly important. Proper storage not only ensures the longevity of these products but also maintains their freshness, potency, and safety.
Today, in this article, we’ll explore the essential techniques and considerations for storing cannabis edibles effectively. Whether you’re a novice or a seasoned enthusiast, knowing about the ideal storage for cannabis edibles will guarantee a consistently enjoyable experience.
This article will discuss the following in detail:
1. What Are Cannabis Edibles?
2. How Long Do Cannabis Edibles Last?
3. What Causes Edibles to Degrade?
4. How to Store Cannabis Edibles Properly?
5. What Storage Materials Are Best for Cannabis Edibles?
6. Signs That Weed Edibles Have Gone Bad
7. Key Takeaways
8. Frequently Asked Questions (FAQs)
What Are Cannabis Edibles?
Cannabis edibles refer to food and beverage products that have been infused with cannabinoids, such as tetrahydrocannabinol (THC) or cannabidiol (CBD), extracted from the cannabis plant. These edibles offer an alternative method of consuming cannabis compared to smoking or vaping. It’s one of the most discreet and convenient options for cannabis users. There are a variety of cannabis edibles, such as chocolates, gummies, cookies, brownies, beverages, candies, and even savory snacks like chips or pretzels.
Each edible product is carefully formulated to contain a specific dosage of cannabinoids. That’s why you can easily control their intake and experience. For instance, a package of cannabis-infused gummies may indicate the amount of THC per gummy. This makes sure you’re consuming a precise dosage.
Besides, cannabis edibles often undergo a thorough production process to ensure consistent potency and flavor. As a result, edibles have gained popularity among both recreational and medicinal users.
Purchase your desired cannabis edibles from Dispo Shop. We offer Dispo Special Deals where you can get high-quality cannabis products at affordable prices.
How Long Do Cannabis Edibles Last?
The shelf life of cannabis edibles can vary depending on several factors, including the type of product, storage conditions, and whether preservatives are used. Generally, properly stored cannabis edibles can last for several weeks to several months. For example, items like cannabis-infused chocolates, gummies, and candies typically have a longer shelf life compared to perishable baked goods like brownies or cookies. Note that weed edibles with oil or butter usually last around 3 to 4 weeks. However, other products such as gummies or candies can be stored for a few months.
It's important to remember that cannabis-infused edible products stored in airtight containers, away from light, heat, and moisture, tend to maintain their potency and freshness for longer periods. Some products, such as concentrates and oils, can even be stored in the freezer for extended periods without any significant degradation. However, you must follow proper storage guidelines to prevent spoilage and maintain the quality of the product.
Furthermore, THC-infused edibles with preservatives may have a longer shelf life compared to those without preservatives, as preservatives help inhibit microbial growth and extend freshness.
What Causes Edibles to Degrade?
Before you learn about how to store cannabis edibles effectively, you need to understand what causes them to degrade. Four factors cause cannabis edible degradation. These factors impact the taste, texture, and effectiveness of the product over time. If you can identify and address these factors, it’s possible to prolong the shelf life of edibles. Let’s understand these factors:
Heat
Heat is a significant contributor to the degradation of cannabis edibles. If the edibles are exposed to high temperatures, it can cause cannabinoids, such as THC, and CBD to break down and lose potency. This process, known as decarboxylation, can lead to the conversion of THC into cannabinol (CBN). As a result, this will degrade the product's taste, texture, and effectiveness over time.
Light
Exposure to light, particularly UV rays, can speed up the degradation of cannabinoids and terpenes in cannabis edibles. Photons from light can cause chemical reactions that degrade the active compounds and result in loss of potency and flavor. In addition, extended exposure to light can lead to discoloration and changes in texture. In essence, light exposure will make your favorite cannabis edibles less appealing and effective.
Air
When we talk about air, we’re mainly concerned about the oxygen it contains. One of the major ways air affects cannabis edibles is through a process called oxidation. When you leave an apple slice out for too long, it turns brown. That’s the effect of oxidation. When oxygen interacts with the compounds in cannabis, it can cause them to change, leading to loss of potency and flavor. Besides, air exposure can cause edibles to lose moisture. That’s why you need to store weed-edible items in properly sealed packaging and airtight containers to minimize air exposure.
Moisture
Excessive moisture can also contribute to the degradation of cannabis edibles because moisture creates an environment conducive to microbial growth and spoilage. If moisture builds up, it can cause edibles to become soggy, moldy, and a loss of quality. This is why it is mandatory to store edibles in a dry environment and avoid exposure to high humidity levels to prevent moisture-related degradation.
How to Store Cannabis Edible Properly
If you want to maintain the freshness and potency of cannabis edibles, you need to store them properly. Whether you’re a seasoned cannabis enthusiast or new to cannabis, following proper storage guidelines can make a significant difference in the quality of your products.
Here's how you need to store cannabis edibles:
1. Keep it Cool and Dry: First thing first, find a nice and cool spot for your edibles. Heat can mess with their potency and freshness, so avoid places like near the stove or oven. Instead, pick a dry place away from any heat source.
2. Say No to Light: Light can be a sneaky enemy to your edibles. It can make them lose their potency and flavor faster. So, store them in a dark place or in containers that keep the light out.
3. Seal the Deal: When you’re not munching on them, make sure your edibles are sealed up tight. Using airtight containers is essential to prevent edibles from going bad too quickly. Some examples of airtight containers are plastic Tupperware, Pyrex glass, mason jars, and so on.
4. Chill in the Fridge: If your edibles have spoilable stuff like dairy or cooked ingredients, pop them in the fridge. It helps keep them from going bad too soon. Just make sure they are sealed well to keep out any funky smells.
5. Freeze for Later: If you have more weed edibles than you can eat right away, freezing them can keep them fresh for longer. But remember, freezing might change the taste or texture of some edibles.
6. Keep Away from Kids and Pets: Your edibles might look tasty to little ones or furry friends. But they are not safe for them. Store your edibles in child-proof containers and keep them out of reach to avoid any accidents.
7. Label Everything: Label the containers with the contents and the date of purchase or production to keep track of freshness and ensure they are not mistaken for non-cannabis products.
8. Follow Expiry Dates: Like all food items, edibles have a shelf life. Pay attention to the manufacturer’s expiry dates and consume them before that time for the best experience.
9. Check for Mold and Unusual Smells: Inspect homemade or natural edibles without preservatives for mold or unusual smells before consumption, regardless of the storage methods.
10. Store Oils Wisely: If you have cannabis-infused oils, stick them in the fridge to keep them fresh. And try to use them up within a few months for the best flavor and potency.
Hope this will help you to store cannabis edibles. Want to learn how to store cannabis concentrates properly? Read this.
Best Storage Materials for Cannabis Edibles
When it comes to storing your cannabis-infused goods, you need to choose the right materials. This can make a big difference in keeping them fresh and tasty. Here are some top options:
· Airtight Containers: Airtight containers are essential for preserving the freshness and potency of your cannabis edibles. To keep the edibles fresh for several weeks, wrap them up with parchment papers, and then store them in an airtight container.
· Glass Jars: You can use mason jars or glass jars for storing cannabis edibles because they are non-porous and don’t absorb odors or flavors.
· Plastic Containers: High-quality food-grade plastic containers with tight-sealing lids can also effectively store cannabis edibles.
· Metal Tins: You can also use metal tins that offer sturdy storage for cannabis-infused baked goods like cookies and brownies. With their tight seals, metal tins protect edibles from exposure to light and air.
· Mylar Bags: Mylar bags are designed to block out light. This makes them an excellent choice for storing light-sensitive cannabis edibles. These durable bags come in various sizes and effectively protect treats from degradation caused by exposure to light.
· Silicon Jars: These bags are suitable for short-term storage. For sticky or gooey cannabis-infused treats like gummies, silicone containers are a convenient storage option. These non-stick containers are easy to clean and maintain.
Signs That Weed Edibles Have Gone Bad
There are some simple indicators through which you can tell whether the cannabis edibles have gone bad or not. Here are the signs:
· Mold or unusual discoloration on the edibles
· Off or rancid smell
· Changes in texture or consistency (e.g., becoming mushy or hard)
· Presence of visible contaminants or foreign objects
· Foul or unpleasant taste
Key Takeaways
· Cannabis edibles usually last weeks to months depending on storage conditions.
· Factors like heat, light, air, and moisture degrade edibles.
· Effective storage involves cool, dark, airtight containers.
· The best materials for storage include glass jars, plastic containers, mylar bags, and silicon bags.
· Signs of spoilage include mold, odor changes, texture alterations, and contaminants.
· Cannabis oils should be stored in the fridge and used within a few months.
Frequently Asked Questions (FAQs)
Here are some relevant questions and answers related to “how to store cannabis edibles.”
1. How Long Can You Store Edible Cannabis?
Ans: You can store cannabis edibles for several weeks to several months. However, this may vary depending on factors like the type of product, storage conditions, and whether preservatives are used or not.
2. How to Store Edibles in the Freezer?
Ans: If you want to store edibles in the freezer, make sure they are properly wrapped in airtight packaging to prevent freezer burn and maintain freshness. Frozen storage can extend the shelf life of some edibles, but it may alter the taste or texture of certain products.
3. How to Store Homemade CBD Gummies?
Ans: Homemade CBD gummies should be stored in a cool, dry, and dark place. The place should also be away from direct sunlight, heat, air, and moisture. Plus, you should use airtight containers, such as glass jars or plastic containers to protect their freshness and potency.
Dispo
November 19, 2024
How to Make Cannabis Tincture?
The interesting thing about the process of making cannabis tincture is, it’s actually very easy to make, and it does not require a lot of materials. There are a bunch of different methods of making cannabis tincture, and all of them have a very similar, and simple straightforward process.
If you are wondering whether you can make cannabis tincture at home, yes you can. Also, there are multiple methods to choose from. So, you can decide which one’s the most convenient and cost effective for you.
Whether you’re an absolute beginner, or a weed enthusiast keen explore and learn how to make cannabis tincture, this article will walk you through five easy methods. Plus, it also covers the complete list of ingredients, and equipment you will need to start making cannabis tincture right away!
What is a Cannabis Tincture?
Cannabis tincture is a highly concentrated liquid extract made by soaking decarbed weed in high proof alcohol, oil, or glycerin. Cannabis tinctures typically contain high levels of THC, the psychoactive compound that produces the euphoric effect, and CBD is the therapeutic compound known for its relaxation, pain-relieving, and sleep-promoting properties.
The word tincture usually refers to alcohol based, especially as cannabis tinctures are popularly made by soaking the plant in alcohol for several days until the cannabinoids, and terpenes fully dissolve with the alcohol in a very concentrated form.
Similarly, the flower can also be dissolved in oil or glycerin, which are non-alcoholic methods of producing the infused extracts. But as the alcohol-based method is popular, and more commonly used hence it goes by the umbrella term cannabis tincture, whether it’s made using alcohol, oil or glycerin.
Ingredients and Equipment Required to Make Cannabis Tincture
The best thing about making cannabis tincture is, it does not require a whole bunch of ingredients, and equipment. The specific ingredients can vary based on your preferred method.
If you choose the alcohol-based method then you will either need ground alcohol, or high proof alcohol. Whereas for non-alcohol-based methods you can either go for carrier oils (plant-based oil) or glycerin.
So, whether you are making it for personal use at home, or in a commercial setting, here are the ingredients and equipment you will need to make cannabis tincture.
Ingredients for Making Cannabis Tincture
· Decarbed Cannabis Flower: 3.5-14 grams
· Ground Alcohol or 190 Proof Alcohol (Like Everclear): 3.5-12 fluid ounce
· Carrier Oil (Coconut Oil or Olive Oil): 3.5-12 fluid ounce
Equipment for Making Cannabis Tincture3]
· Parchment paper or aluminum foil for decarboxylation
· Mason jar for infusing
· Cheesecloth for straining
· 1-ounce glass bottles for storing
· Dropper for pouring
How to Make Cannabis Tincture?
There are a few easy and simple steps of making cannabis tincture which typically include decarboxylating the cannabis flower, infusing it in a solvent (alcohol, oil, or glycerin), straining the mixture, and storing the final product.
Let’s start by learning the alcohol-based method, which is typically the conventional, and the most common way of making cannabis tincture. And then explore alternative, and non-alcoholic methods of infusing the decarbed weed in oil or glycerin to produce cannabis tincture.
Step 1: Decarboxylate the Cannabis Flower
The first step is to decarboxylate, or decarb in short, this process involves activating the THC compound of cannabis by baking the flower at a high temperature of 220-250 F in the oven for 25 to 30 minutes.
So, to decarb your cannabis flower, you will need a baking tray, and parchment paper or aluminum foil. First you will have to either chop the cannabis flower into smaller pieces or grind it into a powdery mix. This is important because the heat needs to evenly spread out for the weed to decarb properly.
After cutting the weed into smaller pieces, or grinding it into a powdered mix, it’s time to put it in the oven, and bake it. Now, carefully place the parchment paper or aluminum foil on the oven’s tray and put small pieces of weed or spread the grinded powder on it.
You can use an extra parchment paper to cover the weed, if it has been grinded, especially to ensure that it doesn’t get blown off while it’s being baked. Make sure that the temperature isn’t set to more than 220-250 F, and don’t bake it longer than 30 minutes; this can burn the weed and destroy the chemical compounds.
So, after baking it for 25 to 30 minutes, you will notice that the weed’s color has changed to brownish or yellow green, that’s when you know that your flower has been decarbed. Once it is baked take the tray out of the oven, and let it sit for a few minutes until it cools down to room temperature.
Step 2: Mix the Decarbed Cannabis with Alcohol
It’s time to soak the decarbed cannabis in alcohol. Ideally, you can use 8 grams of decarbed weed in approximately 2 to 3 fluid ounces of alcohol. If you feel like there is lesser weed, then you can put 2 to 3 grams more for higher potency.
Open your mason jar, put the decarbed weed into the jar, and then fill it in with either ground alcohol, or the190 proof alcohol in proportionate amount. Now stir it well with a spoon until the plant materials totally get mixed with the alcohol solution. Make sure that the weed has completely submerged in the alcohol solution.
Keep in mind that, the lesser the quantity of alcohol, the higher the potency of the tincture. After you are done mixing the decarbed cannabis with the alcohol, close the jars lid tightly and shake it well for about a minute.
Step 3: Keep it Stored, and Shake the Bottle Over Time
By now, you can already guess that the process is quite easy, but the hard part is that it will put your patience to the test. You will have to keep the mixture stored in the jar for 3 to 4 weeks in a cool dark place. And, you will have to shake the jar at least once every day.
If you can shake the jar multiple times every day, then it will accelerate the extraction process. The more you shake the jar, the more it will agitate the weed to get absorbed with the alcohol.
Ideally, it’s best if you can shake the jar 2 to 3 times a day, but even once is enough. If you accidentally forget to shake the jar for a day, don’t worry, just shake it as soon as you notice it.
Shaking the jar is mainly essential to help it mix with the alcohol faster, if you don’t shake it then it will take longer for the alcohol to absorb the cannabis.
Step 4: Strain the Liquid and Extract the Cannabis Tincture
After storing the jar for about 4 weeks, now you have all the natural oils of the cannabis infused with the alcohol. It’s time to strain it out using a cheesecloth. Get a bowl and open the jar’s lid where you have the infused cannabis extract with the alcohol.
Hold the cheesecloth vertically with one hand, and slowly tilt jar the on top of the cheesecloth with the other hand. Now, pour the solution into the cheesecloth, you will notice the greenish plant materials getting trapped on the cheesecloth, while the fatty liquid solution is flowing through.
The liquid that’s being strained and squeezed out of the cheesecloth is your final product, the cannabis tincture. Gradually tilt the jar downwards a bit more allowing the cannabis tincture to pour faster, while the remaining weed gets filtered on the cheesecloth.
Once, all the cannabis tincture gets transferred into the jar, you can throw the filtered plant materials, as the cannabinoid is no longer in the flower, all the chemical extracts are now in the cannabis tincture.
Step 5: Store the Cannabis Tincture in the Glass Bottle
Now all you need to do is carefully store the cannabis tincture in a 1-ounce glass bottle. Take a dropper, and squeeze the tip to pull in the liquid tincture in the dropper, and then place it on top of the 1-ounce glass bottle, and press the tip again to pour it in.
Similarly repeat the process, until you have all the cannabis tinctures transferred to the glass bottles. Alternatively, you can even use a small funnel to transfer the tincture into the glass bottles. After you are done filling each bottle make sure to close its lid, and safely store the bottles in a cool dark place.
You don’t need to keep it in the refrigerator, it will stay fresh if the glass containers are properly sealed and stored in the kitchen’s cabinet or pantry. The best part is cannabis tinctures can practically last forever as it contains alcohol there is almost zero chances of it getting spoiled.
Alternative Methods of Making Cannabis Tinctures
Aside from the conventional method, there are 4 other methods that you can use to make cannabis tincture. Out of the 4 methods, the first two include freeze and green dragon tincture method, which requires alcohol as its base. Whereas the third and fourth method includes the simple home, and green tincture which requires oil as its base.
If you prefer non-alcohol methods of producing cannabis tincture, then you can consider the oil-based methods as an alternative. Each of these methods has its own set of conveniences.
So, let’s get down to the details so that you can learn and understand the method that best fits your preferences.
Freeze Method
This method can be super handy for anyone who’s looking for a much faster way to produce cannabis tincture. On the flip side, you also need to give a bit of extra effort here.
So, you will need to freeze the decarbed cannabis in one jar, ideally, it’s best to use 8 mg of decarbed cannabis for this process. You can add more if you want desire a strong potency.
And, in another jar fill in 16 fluid ounces of alcohol. Close the lids of both jars and put them in the freezer for 24 hours.
After 24 hours, bring out of the jar containing the alcohol and keep it in a bowl filled with water at room temperature for about 30 minutes. This will help the alcohol defrost faster. Then, bring out the jar containing the frozen decarbed cannabis, and pour 3 fluid ounces of alcohol into the jar containing the weed.
Close the lid of jar containing the cannabis mixed with alcohol and shake it very well for about 5 minutes ensuring that it mixes effectively. Now close the lid of both jars and store them in the freezer for 2 hours.
After 2 hours bring the jars out of the freezer and pour the remaining 3 fluid ounces of alcohol into the jar containing mixture. Once again, shake it very well again for 5 minutes, and done! Now, strain the cannabis tincture out using a cheesecloth, and store it in the 1-ounce glass bottles in a cool dark place.
Green Dragon Tincture Method
The green dragon tincture method is a variation of the traditional alcohol-based method that uses fresh, uncured cannabis leaves and stems.
The green dragon tincture method requires almost minimal effort but like the conventional method you will have to give it time, about 3 to 5 weeks.
So, here are the steps that you need to follow to make green dragon tincture.
· Put the decarbed cannabis in a mason jar.
· Pour any grain alcohol like vodka or 190 proof alcohol into the mason jar containing the decarbed cannabis.
· Close the jar’s lid and shake the jar vigorously for a few mins.
· Store it in a cool dark place and shake the jar at least once every day for 3 to 5 weeks.
· After about a month or so, strain out the flower using a cheesecloth, and store your Green Dragon Tincture in the 1-ounce glass bottles.
Oil Infusion Method
If you prefer the non-alcohol recipe, then perhaps you can consider using the oil infusion method instead. But compared to all the other methods, this one requires the highest amount of physical effort.
On the other hand, like the freezing method, this one yield faster results. So, if you want to save time and produce cannabis tincture in 3 hours or so, then the oil infusion method will certainly be helpful.
Let’s get started with the process.
· Heat up a saucepan in low heat, and then pour 1 cup of coconut or olive oil on the saucepan and wait for 1 minute for the oil to heat up.
· Now put 7 grams of decarbed cannabis flower on the saucepan and stir it well to ensure it mixes with the oil.
· Keep the stove’s heat at a low temperature and occasionally stir it for about 3 hours.
· After 3 hours, turn off the stove and wait for about 10 mins for the mixture to cool down.
· Get a bowl, and cover the top part with a cheesecloth, and then hold the saucepan firmly and put the entire mixture on the cheesecloth
· Gently wrap the mixture by covering it with the cheesecloth, and slowly squeeze out the oil into the bowl, and done, you have your own infused cannabis tincture
· Throw out the remaining greens, and securely store the cannabis tincture in 1-ounce glass bottles in a cool dry space.
The Simple Home Method
You can probably guess why it’s called the simple method; this one literally requires almost zero effort. The simple method also requires the use of oil, but you just need soak the decarbed cannabis in a jar containing either coconut or olive oil for at least 3 weeks or about 5 weeks.
Similarly, like every other method, you will have to shake the jar at least once daily. Unlike the oil infusion method, you don’t need to go through any complex boiling process. So, after 3 to 5 weeks, you can strain the oil out using a cheesecloth, and done, your cannabis tincture is ready!
Ideally, its best to use 7 grams of decarbed cannabis, and 1 cup of either coconut or olive oil. You can use more weed, or oil for enhanced potency, and of course if you are making it in higher quantity. But make sure to do it proportionally, in general it’s based on following a standard procedure, and gradually tweaking the ingredients with acquired experience.
Should I Make Cannabis Tinctures at Home or Buy Them?
Well that totally depends, whether you are willing to give all that effort to make cannabis tincture. Plus, you will either have to spend a substantial amount of time to prepare the cannabis tincture or wait several weeks for decarbed cannabis to soak in and diffuse with the alcohol or oil.
So, if you’re not up for the effort, and more importantly if you need it any time soon, then it’s better to buy it from a cannabis dispensary. We have a great collection of cannabistinctures that you can check out.
Regardless, if you’re passionate about learning how to make cannabis tincture, you should try any of the methods that’s feasible for you. But when it comes to quality, and ensuring the right dosage, it’s always best to trust professionals and buy it from a trusted weed dispensary.
Final Remarks
By now you know 5 different methods to make your own cannabis tincture starting from the traditional alcohol-based approach to the innovative freeze and oil infusion techniques. So, depending on your preference you can choose whichever method seems the most suitable option for you.
Although while trying out these homemade methods, it’s best to be extra careful, and take it slow. If it’s your first time, it’s best to precisely follow the recommended dose in this guide.
Feel free to experiment as you acquire more experience, but for starters it’s quite difficult to determine the potency, and effectiveness of the tincture. So, it's best to make it proportionately in smaller amounts, and while you are at it, make sure to consume the cannabis tincture responsibly.
FAQs
How to make cannabis tincture?
The conventional method of making cannabis tincture is to soak decarboxylated cannabis in high proof alcohol for 3 to 4 weeks, and then straining out the extracted liquid, which is the cannabis tincture. Apart from using alcohol, there are oil infusion techniques to make cannabis tincture similarly using coconut or olive oil.
How to make cannabis tincture using non-alcohol methods?
Non-alcohol method includes oil infusion technique which involves mixing decarboxylated cannabis in hot oil while actively stirring it for about 3 hours, and then straining the oil with a cheesecloth. Another way is the simple home method which involves soaking the decarbed cannabis in oil for 3 to 5 weeks, and then straining it with a cheesecloth.
How long does it take to make cannabis tincture?
The time that it can take to make cannabis tincture depends on the method. Methods such as the traditional alcohol-based technique, green dragon tincture, and the simple home method can take 3 to 4 weeks. Whereas you can make cannabis tincture within a couple of hours using the freeze method, or the oil infusion technique.
Dispo
November 18, 2024
How to Store Cannabis Flower Properly?
Storing cannabis flowers isn’t a difficult task at all. However, whether you’re a cannabis grower or seasonal toker, knowing how to store cannabis flowers can certainly help you maintain their freshness, potency, and flavor. Proper storage of your expensive cannabis bud not only ensures you get the most out of it but also improves its shelf life and longevity.
Today, in this article, we’ll guide you to preserve and store marijuana flowers properly. We’ll answer the following questions to help you out in this regard:
1. Importance of Properly Storing Cannabis Flowers
2. Factors That Affect the Freshness of Cannabis Flowers
3. The Effective Way to Store Cannabis Flowers
4. What Are the Best Containers for Cannabis Storage
5. How Do You Know If Marijuana Has Gone Bad?
6. Key Things to Remember While Storing Cannabis (Do’s and Don’ts) Answering
7. Cannabis Flower Storage FAQs
Importance of Properly Storing Cannabis Flowers
It’s simple! If your favorite marijuana flowers are stored properly, you can easily maintain their quality, potency, and safety over time. You might have been wondering now how long cannabis flowers last. There is no expiration date for cannabis buds. However, research reveals that cannabinoids can remain stable with a shelf life ofup to 2 years without significant degradation in potency or quality.
In contrast, failing to store them correctly can lead to taste, aroma, and effects degradation. Factors such as exposure to light, air, heat, and humidity can accelerate the breakdown of cannabinoids and terpenes within the flowers. This can result in decreased potency and potential development of mold or mildew.
Therefore, if you store marijuana flowers in a cool, dark, and dry environment, you can minimize the risks and preserve the integrity of the flower for longer periods. In addition, proper storage practices ensure that consumers can get a consistent and enjoyable cannabis experience.
If you’re looking for different types of high-quality cannabis flowers, you should consider checking Dispo’s Cannabis Dispensary.
Factors That Affect the Freshness of Cannabis Flowers
Several factors can influence the potency and freshness of cannabis flowers. If one of the factors is not maintained properly, you might experience taste, aroma, or potency changes.
Here are the key factors to keep in mind:
1. Temperature
2. Humidity
3. Light Exposure
4. Air Circulation
Temperature
Cannabis is like whiskey or wine. If it is exposed to heat, the terpenes begin to evaporate. Terpenes are compounds present in marijuana flowers responsible for smell, and flavor. Besides, high temperatures can also accelerate the conversion of cannabinoids like psychoactive THC to non-psychoactive CBN. This also leads to decreased potency.
Conversely, freezing temperatures can cause the trichomes on the flower to become brittle which affects its texture, and quality. That is why while storing cannabis flowers, it is essential to know that the ideal temperature for storing cannabis is between 60 to 68 degrees Fahrenheit. A general rule of thumb is to safekeeping cannabis flowers under 70 degrees Fahrenheit.
Humidity
When it comes to curing and storing cannabis flowers, managing the relative humidity (RH) of the plant is one of the most crucial factors to consider. Excessive moisture can create an ideal environment for mold and mildew growth. This also poses health risks to consumers and compromises the integrity of the products.
Here Is Guide: Cannabis Flower Measurement Guide
On the other hand, low moisture can cause the flower to dry out. This results in harsh smoke, and diminished potency. Properly controlling humidity levels within the storage environment is essential to prevent moisture-related issues. Therefore, the best practice is to maintain an ideal humidity level inside the container which is 55% to 65%.
Light Exposure
Light and sunlight exposure, in particular, can have a damaging effect on the purity of cannabis flowers. It cuts the potency and deteriorates the bud’s taste. In addition, ultraviolet (UV) light can degrade the cannabinoids and terpenes as well and lead to a loss of potency and aromatic properties.
To minimize light exposure, cannabis flowers should be stored in opaque or UV-resistant containers and kept away from direct sunlight. Properly storing flowers in a dark environment helps maintain their quality and prolongs their freshness.
Air Circulation
Air circulation is another key factor that can impact the freshness of weed flowers. Exposure to excessive air or oxygen can accelerate the degradation of cannabinoids and terpenes. However, storing cannabis flowers in airtight containers helps minimize air exchange and preserve the integrity of the flower. Besides, proper ventilation within the storage space can help regulate humidity levels and prevent the buildup of stale air to ensure optimal freshness of the flowers.
How to Store Cannabis Flowers: The Effective Ways
Flowers from cannabis should be kept in a dark, dry, and cool place. The secret to success is understanding how cool and dark is best to store marijuana. So far, you have already read about the key factors that affect the shelf life of cannabis. By optimizing these factors – temperature, humidity, light, and air– you will be able to perfectly store weed flowers for better potency and purity and extend their shelf life.
Control Temperature
To put it simply, always store marijuana flowers in a cool, dark, and dry environment to maintain their quality. To prevent the degradation of cannabinoids and terpenes, you should aim for temperatures below 70 degrees Fahrenheit (21 degrees Celsius). Again, avoid storing flowers in areas prone to temperature fluctuations, such as near appliances or heating vents.
Regulate Humidity Levels
As we’ve discussed earlier, too much moisture creates a breeding ground for mold and mildew. This is why, you need to control humidity levels to prevent mold growth and maintain the ideal moisture content of cannabis flowers. You can use humidity packs or desiccants to regulate humidity within the storage container. When it comes to storing marijuana flowers, make sure to keep them under relative humidity of 55% to 65%.
Store in a Dark and Cool Location
Choose a storage location that meets the criteria of being cool, dark, and dry. Ideal storage spots include cabinets, closets, or high shelves away from heat sources and direct sunlight. However, you should not store cannabis flowers in a deep freezer or a refrigerator, as these environments can cause excess moisture and compromise the purity of the flowers.
Here is a Guide: How to Use a Vaporizer for Cannabis Flowers?
Reduce Exposure to Air
Exposure to oxygen in the air can trigger oxidation reactions in cannabis. This process breaks down cannabinoids and terpenes. Oxidized cannabis may become less effective and less enjoyable to consume. Besides, exposure to air and lights can also slowly convert THCA into THC, and then CBN. To preserve a high level of potency, always store flowers in airtight containers and create a barrier against air exchange. You can choose sealable glass jar containers with secure lids.
What Are the Best Containers for Cannabis Storage?
Selecting the right container for storing cannabis is essential for preserving its freshness, potency, and flavor. Let’s discuss the right kind of containers that you should choose for keeping your favorite cannabis buds.
· Airtight Glass Jars: Airtight glass jars, such as mason jars, are widely used and considered one of the best options for keeping cannabis fresh and potent. They come with sealable lids that create a tight seal when closed. Besides, they do not impart any flavors and odors to the cannabis.
· UV-Proof Glass Containers: These glass containers are designed to block ultraviolet light. You can use these containers for long-term storage of cannabis. Plus, they are ideal for storing cannabis in sunny or well-lit environments.
· Vacuum-Sealed Bags: These bags are suitable for both long-term and short-term storage of cannabis. They are particularly useful for storing large quantities or for maintaining discretion. Vacuum-sealed bags can prevent oxidation and moisture buildup as well.
· Metal Tins or Tins with Lids: These containers offer durable and airtight storage solutions for cannabis. They protect against light and air and preserve the freshness and potency of marijuana.
· Ceramic Jars or Containers: This is a stylish and functional option for cannabis storage. These are non-reactive, odor-resistant jars. They provide a stable environment and don’t absorb flavors.
How Do You Know If Marijuana Flowers Has Gone Bad?
You can tell if your marijuana has gone bad by using your senses:
1. Smell: Fresh marijuana has a distinct aroma, while bad marijuana may smell musty or have no scent at all.
2. Touch: Good cannabis flowers should feel dry but not brittle or overly moist. If it feels squishy, wet, or disintegrates easily, it’s likely gone bad.
3. Appearance: Check for any changes in color or texture. Moldy cannabis may appear discolored or have visible signs of mold growth.
4. Taste: If you consume it, moldy or degraded cannabis buds may taste unpleasant or different from its usual flavor.
Key Things to Remember While Storing Cannabis Flowers
Here are some key things to keep in mind when it comes to storing cannabis properly:
· Choose airtight containers, such as glass jars or UV-proof containers, to prevent air exposure and maintain freshness.
· Store cannabis in a cool, dark place to minimize degradation caused by light and heat.
· Keep cannabis out of the freezer or refrigerator since the temperature changes can affect its quality.
· Monitor humidity levels to prevent mold growth and maintain optimal moisture content.
· To maintain distinct flavor profiles, store different strains in different containers.
· For long-term preservation, use vacuum-seal cannabis to reduce air exposure and preserve potency.
· To ensure safety, keep cannabis out of the reach of kids and animals.
· Regularly inspect cannabis that has been stored for indications of deterioration, such as color, texture, or scent changes.
The Bottom
Line To store cannabis flowers properly, use airtight glass jars in a cool, dark place. Avoid storing in the fridge or freezer, as fluctuating temperatures can harm quality, keep cannabis away from light, heat, and air to maintain potency and flavor. Use separate containers for different strains and check regularly for signs of degradation. Vacuum-seal for long-term storage and ensure it’s out of reach of children and pets. Proper storage preserves freshness and potency for an enjoyable experience.
Frequently Asked Questions (FAQs)
Here are some common questions and answers related to “how to store cannabis flowers properly.
How Long Can I Store Cannabis Flowers?
Ans: Properly stored cannabis flowers can last from six months to two years. However, potency gradually decreases over time.
Can I Reuse Containers for Storing Cannabis?
Ans: Yes, as long as the containers are clean and airtight. Avoid using containers that previously held strong odors or flavors.
Dispo
November 18, 2024
Benefits of using Pre-Rolled Joints for Cannabis Enthusiasts
As cannabis legalization continues to expand across various regions, including the United States, the exploration of different consumption methods becomes increasingly relevant for both beginners and seasoned cannabis users. Among these methods, cannabis pre-rolled joints have obtained attention for their convenience and accessibility.
In this article, we’ll discuss the benefits of using pre-rolled joints, exploring their convenience, consistency, variety, and other advantages they offer to consumers. Pre-rolled joints offer a convenient and affordable option for anyone looking for a hassle-free smoking experience, standardized dosage, or a social and recreational option.
What Are Pre-Rolls?
Simply put, pre-rolled joints are also known as ready-made joints. It eliminates the need for users to roll their own. These joints typically consist of three components: cannabis flowers, rolling paper, and a filter. Plus, you can also get pre-rolls infused with cannabis concentrates for enhanced potency. Pre-roll joints offer a convenient and portable option for cannabis consumption which is suitable for both novice and experienced tokers.
When people buy pre-rolls, they don't have to spend time and learn how to roll joints by hand; the machine does it for them. Since the pre-rolls are easy to get, they are great for on-the-go use as well.
The Benefits of Using Pre-Rolled Joints
In the cannabis market, pre-rolled joints are quite popular now. They offer many benefits for both new and experienced users such as convenience, consistency, portability, and so on.
Here is a list of the benefits of using pre-rolled joints:
1. Ease of Use
2. Portability
3. Standardized Dosage
4. Diverse Strains and Flavors
5. Cost-Effective
6. Time-Saving
7. Social Aspect
8. Preservation of Flower Quality
Ease of Use
Pre-rolled joints are user-friendly both for beginners and experienced smokers. It just gives you a very straightforward cannabis consumption experience. People who are new to cannabis smoking might not be able to roll a joint on their own. Ready-to-use joints are an ideal option for them. Hand-rolled joints require skill and practice to achieve satisfactory roll whereas pre-rolls are ready to use out of the packaging.
This ease of use makes pre-rolled joints particularly appealing to beginners who may be intimidated by the process of rolling their own joints. With pre-rolls users can simply retrieve a joint from its packaging, light it up, and enjoy! This accessibility and simplicity make cannabis pre-rolled joints a convenient and trouble-free option for both new and experienced consumers alike.
Portability
Pre-rolled joints are super easy to take with you wherever you’re headed! They come in small, convenient packages that fit right in your pocket or bag. So, whether you’re off on an adventure, hanging out with friends, or just chilling at home, pre-rolls are always ready to go.
You don’t have to worry about carrying extra stuff like rolling papers or grinders because everything you need is already packed into the pre-roll. It’s like having your favorite smoke buddy right by your side, no matter where you go! Take out a pre-roll, put it in your pocket, and you're ready to enjoy weed on the go!
If you want to buy high-quality pre-rolls that are more potent and give you the effects you want, DispoDispensary is the place to go. We have a lot of DispoSpecial Deals at prices you can afford. So, pick out the strain you like most for your pre-rolls here!
Standardized Dosage
Have you ever wondered if you’re getting the same amount of cannabis every time you light up? With pre-rolled joints, you don’t have to guess! These joints are rolled by machines, which means they’re made to be the same every single time.
That’s a big deal, right? It means you can trust that you’re getting a consistent dose of cannabis with each pre-roll you smoke. No more worrying about accidentally taking too much or too little. Plus, pre-rolled joints come with clear labels, so you know exactly what’s in them.
Whether you prefer a mellow vibe or a more intense experience, you can find a pre-roll that’s just right for you. So what’s the wait? Relax, and enjoy your perfectly dosed pre-roll!
Diverse Strains and Flavors
You can choose the best cannabis pre-rolls according to your needs. The coolest thing about pre-rolled joints is the wide variety of strains and flavors available. Whether you’re into indica, sativa, or hybrid strains, there’s something for everyone.
Indica strains are great for chilling out and relaxing, while sativa strains are perfect for improving your mood and energy levels. And if you can’t decide, you can always have the option to pick a hybrid strain. It gives you a balanced experience.
But it's not just about the strain— pre-rolled joints come in a ton of delicious flavors as well. From fruity to earthy to spicy, there’s a flavor to suit every taste bud. If you’re looking for a classic strain or something new and exciting, pre-rolls can certainly fulfill your needs.
Time-Saving
Another benefit of using pre-rolled joints is that it saves your precious time. As you don’t have to put effort into rolling your joints, you can save time and get straight to the good stuff! Choosing readymade joints means you don’t need to grind up cannabis, hunt for rolling papers, or struggle to that perfect roll.
Whether you’re a busy bee with a packed schedule or just want to enjoy your cannabis without the fuss, pre-rolls are a convenient solution. In essence, buying cannabis pre-rolled joints from reputed dispensaries will not only make sure you get the desired effects and benefits but also save you a lot of time!
Cost-Effective
If you want to stretch your cannabis budget without sacrificing quality, pre-rolled joints are your answer. You can enjoy your favorite strains without spending a lot of money. When you buy pre-rolled joints, you’re not just getting cannabis – you’re also saving money on all the extras.
You don’t need to invest in rolling papers, filters, or grinders – it’s all included in the pre-roll package. Plus, pre-rolls come in single servings, so you can control exactly how much you want to spend. In short, choosing pre-rolled joints filled with weed flowers will make every smoke session a budget-friendly delight!
Social Aspect
Pre-rolled joints aren’t just about getting high – they are also about sharing the experience with friends and enjoying the social side of cannabis culture. Passing around a pre-roll is a time-honored tradition among cannabis enthusiasts. It’s a chance to connect with friends, bond over shared experiences, and create lasting memories.
Whether you’re at a party, a concert, hanging out with friends, listening to music, or watching movies, pre-rolled joints make it easy to join in the fun. No need to bother with rolling papers or worry about making a mess— just light up, pass it around, and share the good vibes.
Preservation of Quality Flower
Pre-rolled joints are not only convenient but also help preserve the quality of your cannabis flower. When you buy pre-roll from reputable sources, you can trust that the flower used is of high quality and properly preserved. They are typically made with fresh, ground buds that are carefully selected to ensure optimal flavor and potency. This means you can enjoy the full spectrum of effects and flavors that the chosen strain has to offer.
Furthermore, pre-rolls are expertly rolled and sealed to protect the integrity of the flower. This helps prevent exposure to air, light, and moisture, which can degrade the quality of the cannabis over time. As a result, you can expect a consistently enjoyable smoking experience with every pre-roll you light up.
What Are The Alternatives to Pre-Rolls?
If pre-rolled joints aren’t your thing, don’t worry—there are plenty of other ways to enjoy cannabis. Here are some popular alternatives to pre-rolls:
1. Cannabis Vapes: Vaping is a popular option for those who prefer a smoke-free experience. Cannabis vapes heat up cannabis oil or flowers at low temperatures, producing a smooth vapor that can be inhaled.
2. Edibles: Edibles come in various forms such as gummies, chocolates, or baked goods. They offer a discrete and long-lasting cannabis experience, perfect for those who want to avoid smoking.
3. Tinctures: Cannabis tinctures are liquid extracts that are placed under the tongue for fast absorption. They offer precise dosing and can be easily added to food and beverages.
4. Traditional Smoking Methods: For those who enjoy the ritual of smoking traditional methods like bong, pipes, and bubblers are still popular choices. These methods offer an immediate onset of effects and allow users to enjoy the full flavor of the cannabis flower.
Potential Downsides of Cannabis Pre-Rolled Joints
Here are some downsides of using cannabis pre-rolled joints:
1. Pre-rolls may burn unevenly, leading to an unsatisfactory smoking experience.
2. There can be doubts about the quality and consistency of the cannabis used in pre-rolls, particularly if sourced from unreliable sources.
3. Pre-rolls contribute to waste through excess packaging and plant material that raise concerns about their environmental impact.
4. Some users feel that pre-rolls lack the personal touch and ritual of hand-rolling which can negatively affect the entire smoking experience.
5. Pre-rolls may not offer the same level of customization as rolling your own joints, as they typically come in standardized sizes and strains.
The Bottom Line
There are many benefits of using pre-rolled joints. I hope this article helped you understand this. To sum up, cannabis pre-rolled joints offer convenience, consistency, and a wide variety of strains and flavors which make them an easy and enjoyable way to consume cannabis. They save time and are beginner-friendly, perfect for newbies. Also, pre-rolls provide standardized dosing and are portable. But what if you don't want to smoke pre-rolls? That's fine. You can try edibles, tinctures, or vapes instead. It’s always up to you.
Frequently Asked Questions (FAQs)
Here are some relevant questions and answers related to the “benefits of using pre-rolled joints.”
1. Are Pre-rolled Joints Worth it If I’m New to Cannabis?
Ans: Absolutely! If you're a beginner, pre-rolled joints are easy to use and save you the trouble of learning how to roll your own. They are the best choice for beginners because they are easy to use, give regular doses, and let you try a variety of strains.
2. How Do Pre-Rolled Joints Compare to DIY Rolling?
Ans: Pre-rolled joints are easy to use. It’s a great option to choose while you're out. They also offer regular doses and a lot of different strains so you can choose the one you like most. On the other hand, do-it-yourself rolling lets you make changes, but pre-rolls are great for people who want a hassle-free experience.
Dispo
November 17, 2024